
To follow this post, you should first read Authentication in Nuxt, Part One.
In this post, I cover how to add email verification to your existing authentication system, as proposed in Part One, which is based on the Nuxt.js auth module, Express.js, and Passport.js. I also explain how to implement password changing and resetting
Changing the Existing User Model
First, slightly modify the user model by adding four new properties. You will need the following fields:
verificationToken- to format a unique URL for the user so they can prove access to the provided email accountverificationTokenExpire- to restrict access to the URL for only a specified time spanisVerified- to save the results of verificationresetPassword- to indicate that a user wants to reset the password
//api/models/user.js

const UserSchema = new Schema({
  email: { type: String, required: true, unique: true },
  password: { type: String, required: true },
  verificationToken: { type: String, required: true},
  verificationTokenExpire: { type: Date, required: true },
  isVerified: { type: Boolean, required: true, default: false},
  resetPassword: { type: Boolean, required: true, default: false}
})
Setting Up an Email Provider
Instead of using your email's SMTP configuration, opt for professional email delivery services like SendGrid or MailGun, which offer convenient APIs and reasonable prices. SendGrid is entirely free for up to 100 emails per day. Therefore, I will continue this post based on it, as it should suffice for testing purposes and even many production web apps.
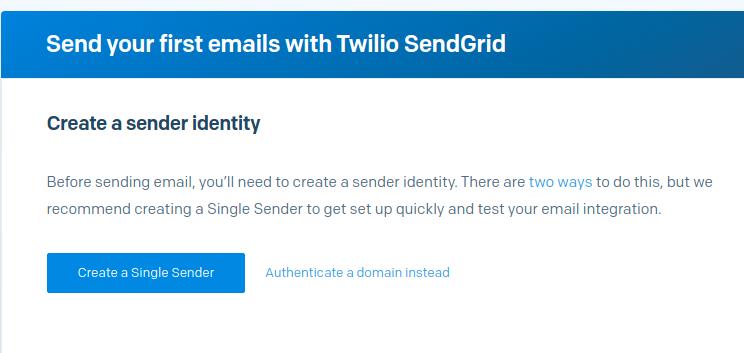
After setting up your account and creating a single sender in SendGrid:
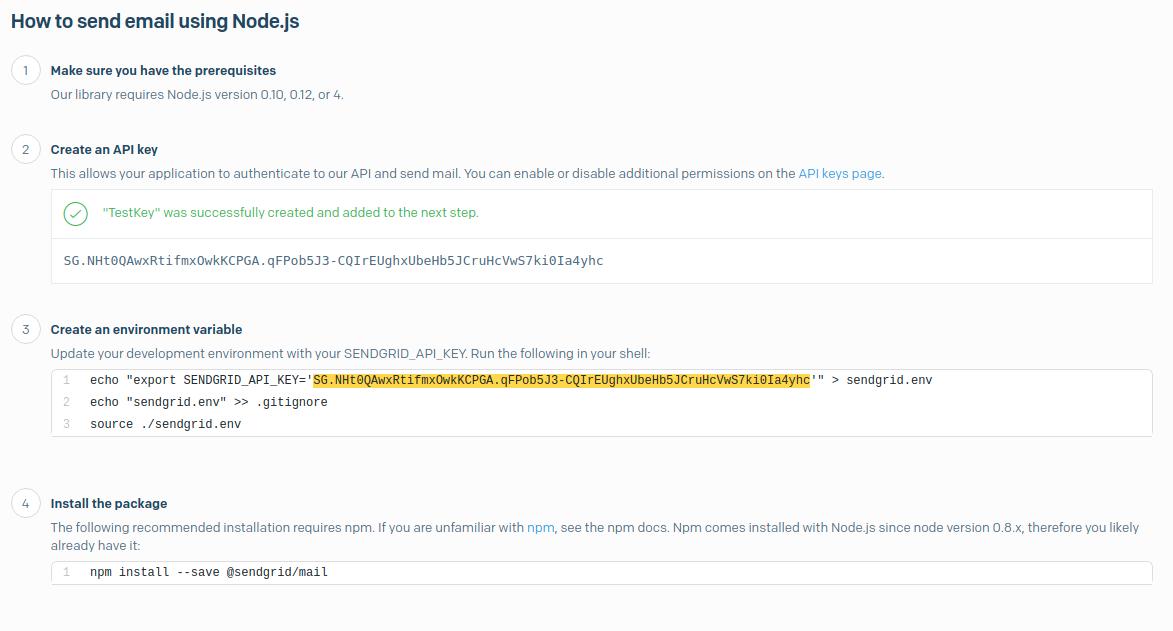
- Follow the steps for a Node.js environment in the API web integration guide (Email API tab).
- Do not accept verification yet when asked. First, check if it works in your app.
Creating an Email Controller
Create a new controller for managing the email sending process.
//api/controllers/mailer.controller.js

const sgMail = require('@sendgrid/mail')
sgMail.setApiKey(process.env.SENDGRID_API_KEY)

const from = 'dev@blowstack.com'

async function SendEmail (to, subject, text, html) {

  const msg = {
    to,
    from,
    subject,
    text,
    html
  }
  await sgMail
    .send(msg)
    .then(() => {
      console.log('Email sent')
    })
    .catch((error) => {
      console.error(error)
    })
}

export default {
  SendEmail
}
Test your newly implemented API by sending a message every time someone registers in your app.
//api/routes/authentication.js

...
import MailerController from '../controllers/mailer.controller'
...

router.post('/auth/register', async (req, res) => {
 ...
  await AuthenticationController.CreateUser(email, hashedPassword)

    .then(async () => {
      await MailerController.SendEmail(
      	email
      	'Registration confirmation',
      	'You has been registered correctly',
      	'<p>You has been registered correctly</p>'
      )
      res.send({ status: 'ok' })
    }).catch((err) => {
      throw err
    })
})
If everything works as expected, remember to finalize and accept the implementation within SendGrid!
Creating Verification Tokens Using Crypto and JWT
Once the email service is operational and the user model has been appropriately modified, you can start generating verification tokens to send them after the registration process. Utilize the up-to-date, built-in Node.js package, crypto, for this purpose.
To proceed, implement four new functions responsible for:
- Generating a verification token - This will be a randomly generated, long string.
- Generating a verification token expiration time - This defines how long the token is valid.
- Verifying a signed verification token - This involves the verification of a JWT string.
- Signing a verification token - This alters the token into a JWT.
Additionally, define a constant for the default expiration time of the token, which in this example is set to span one day. It's also recommended to use a different secret for generating JWT strings for user passwords.
//api/controllers/authentication.controller

...
const crypto = require('crypto');
const expireSpan = 3600 * 1000 * 24 // One day
const authEmailVerificationSecret = process.env.AUTH_EMAIL_VERIFICATION_SECRET

async function CreateUser (email: string, password: string) {
  const verificationToken = generateVerificationToken()
  const verificationTokenExpire = generateVerificationTokenExpire()
  return await User.create({ email, password, verificationToken, verificationTokenExpire })
    .then((data) => {
      return data
    }).catch((error: Error) => {
      throw error
    })
}

function generateVerificationToken () {
  return crypto.randomBytes(30).toString('hex')
}

function generateVerificationTokenExpire () {
  return new Date(Date.now() + expireSpan)
}

function signVerificationToken (email, verificationToken) {
  return jwt.sign({
    email,
    verificationToken
  }, authEmailVerificationSecret)
}

function verifySignedVerificationToken (token) {
  return jwt.verify(token, authEmailVerificationSecret)
}


export default {
  ...
  generateVerificationToken,
  generateVerificationTokenExpire,
  signVerificationToken
  verifySignedVerificationToken
  ...
}
After storing a token in the database, it's still necessary to send it to the newly registered user. First, add a new method to the mailer controller, sendRegistrationToken, responsible for sending verification token messages. Create an auxiliary method to strip HTML tags from the template, allowing it to be passed as simple text to the sendEmail method. For enhanced security and efficiency, use JWT to link a user's email and token, preventing the real token from being disclosed to the user and enabling a quick database query when a user clicks the verification link.
// api/controllers/mailer.controller.js

function stripHtmlTags (html) {
  return html.replace(/(<([^>]+)>)/gi, "");
}

async function SendRegistrationToken (to, subject, verificationToken) {
  const html = `<p>Please click into the link below to confirm your email address and finish the registration</p><a href="http://localhost:3000/register/confirmation?token=${verificationToken}">Active your account</a>`
  const text = stripHtmlTags(html)
  await SendEmail(to, subject, text, html)
}
Next, incorporate sendRegistrationToken in the authentication.js file within the routes folder. At this point, it's necessary to utilize the user variable returned from the Promise to obtain the token. It's crucial to pair the email and token into a JWT, possibly using a different secret than the one used for JWT user password creation. The resulting code should resemble the following:
//api/routes/authentication.js

router.post('/auth/register', async (req, res) => {
 ...
  await AuthenticationController.CreateUser(email, hashedPassword)

    .then(async (user) => {
      const signedVerificationToken = AuthenticationController.signVerificationToken(user.email, user.verificationToken)
      await MailerController.SendRegistrationToken(
        email,
        'Registration confirmation',
        signedVerificationToken
      )
      res.send({ message: 'We send an email with verification link. Check your inbox!' })
    }).catch((err) => {
      throw err
    })
})
Ensure the token is sent during registration. For the moment, clicking the link leads nowhere. Implementing the token verification logic and a suitable view in Nuxt.js is the next step.
Verify Tokens: Create Vue and Controller
To facilitate email verification, you'll need to create a view where users are redirected after clicking the verification link. This involves setting up a new Vue file within a dedicated confirmation folder under the register directory. The process will be initiated through the mounted lifecycle hook. Depending on the outcome of the verification, display either a login button (for successful verification) or a button to resend the verification link (if verification fails).
// pages/register/confirmation/index.vue

<template>
  <div class="mt-12">
    <v-container>
      <v-row justify="center" class="mt-12 text-center">
        <v-col cols="12" v-if="confirmationStatus === 'verified'">
          <v-btn to="/login" class="ma-3" color="primary">Go to login page</v-btn>
        </v-col>
        <v-col cols="12" v-else-if="confirmationStatus === 'unverified'">
          <v-btn to="/register/confirmation/resend" class="ma-3" color="primary">Resend a verification token</v-btn>
        </v-col>
      </v-row>
    </v-container>
    <snack-bar :snackbar-message="snackbarMessage"></snack-bar>
  </div>
</template>

<script>
import SnackBar from '@/components/snackBar'

export default {
  name: 'index',
  components: { SnackBar },
  data: () => ({
    resend: false,
    confirmationStatus: false,
    snackbarMessage: ''
  }),
  methods: {
    async checkToken () {
      const token = this.$route.query.token
      const verification = await this.$axios.post('/api/auth/confirmation/', {
        token
      })
      this.confirmationStatus = verification.data.confirmationStatus
      this.snackbarMessage = verification.data.message
    }
  },
  mounted () {
    this.checkToken()
  }
}
</script>
For the backend, create a new route in authentication.js dedicated to the verification process. It should extract the email and verification token from the received token and find the user based on the extracted email. There are two main scenarios: a user with the corresponding email is found and the token (along with its expiration span) is valid, or any other scenario where these conditions are not met.
// api/routes/authentiaction.js

router.post('/auth/confirmation', async (req, res) => {
  const token = req.body.token
  const { email, verificationToken } = AuthenticationController.verifySignedVerificationToken(token)
  const user = await AuthenticationController.GetUser(email)

  if (user && user.verificationToken === verificationToken && user.verificationTokenExpire >= new Date()) {
    user.isVerified = true
    user.save()
    return res.send({
      confirmationStatus: 'verified',
      message: 'Your email has been verified.'
    })
  } else {
    return res.send({
      confirmationStatus: 'unverified',
      message: 'Email can\'t be verified!\n. The possible reason is expired token.'
    })
  }
})
Resend Verification Tokens
It's important to provide an option for users to resend verification emails if tokens expire or are not delivered. Create a new route in authentication.js to handle token resending. This route finds a user by email, generates a new token and expiration span, and sends the new token via email.
// api/routes/authentication.js

router.post('/auth/confirmation/resend', async (req, res) => {
  const email = req.body.email
  const user = await AuthenticationController.GetUser(email)

  if (user && user.isVerified === true) {
    return res.send('All ready verified.')
  } else if (user) {
    const verificationToken = AuthenticationController.generateVerificationToken()
    const verificationTokenExpire = AuthenticationController.generateVerificationTokenExpire()

    user.verificationToken = verificationToken
    user.verificationTokenExpire = verificationTokenExpire
    user.save()

    const signedVerificationToken = AuthenticationController.signVerificationToken(user.email, user.verificationToken)

    await MailerController.SendRegistrationToken(user.email, 'Registration confirmation - resend', signedVerificationToken)

    return res.send('Token has been resent.')
  } else {
    return res.send('Token can\'t be resent.')
  }
})
Create a Form for Email Input and Resending Verification Tokens
To facilitate the process of resending verification tokens, create a form component with a single input field for the user's email. This form should also include props for the button title and the email, allowing it to be utilized within a Vue component dedicated to token resending.
Email Form Component
// forms/emailForm.vue

<template>
  <v-form
    ref="form"
    v-model="form.valid"
    lazy-validation
    class="div-center"
  >
    <v-text-field
      v-model="form.email"
      :rules="emailRules"
      validate-on-blur
      label="E-mail"
      required
    ></v-text-field>

    <v-btn
      :disabled="!form.valid"
      color="indigo lighten-1"
      class="mr-4"
      @click="validate"
    >
      {{ buttonTitle }}
    </v-btn>
  </v-form>
</template>

<script>
export default {
  name: 'emailForm',
  data: () => ({
    emailRules: [
      v => !!v || 'E-mail is required',
      v => /.+@.+\..+/.test(v) || 'E-mail must be valid'
    ]
  }),
  props: {
    buttonTitle: {
      required: true
    },
    form: {
      required: true
    }
  },
  mounted () {
    this.form.valid = false
  },
  methods: {
    validate () {
      if (this.$refs.form.validate()) {
        this.form.finish = true
        this.$emit('update:form', this.form)
      }
    }
  }
}
</script>
Vue Component for Resending Verification Tokens
Then, use this form within a new Vue component that allows users to request the resending of their verification token. You can place this component in a new folder named resend within the register folder, creating a seamless flow for users who need to resend their verification token.
// pages/register/resend/index.vue

<template>
  <div class="mt-12">
    <v-container class="text-center">
      <v-row class="mt-12 text-center" justify="center">
        <h2>Verification token resending</h2>
      </v-row>
      <v-row :align="'center'"
             :justify="'center'" class="mt-12 ">
        <v-col cols="12" md="6" lg="3">
          <email-form button-title="Resend verification token" :form.sync="form"></email-form>
        </v-col>
      </v-row>
    </v-container>
    <snack-bar :snackbar-message.sync="snackbarMessage"></snack-bar>
  </div>
</template>
<script>

import EmailForm from '@/forms/emailForm'
import SnackBar from '@/components/snackBar'

export default {
  components: {
    SnackBar,
    EmailForm
  },
  data: () => ({
    snackbar: false,
    snackbarMessage: '',
    form: { finish: false }
  }),
  computed: {
    finish () {
      return this.form.finish
    }
  },
  watch: {
    finish (newVal) {
      if (newVal) {
        this.resendToken(this.form.email)
        this.form.finish = false
      }
    }
  },
  methods: {
    async resendToken (email) {
      const resendVerification = await this.$axios.post('/api/auth/confirmation/resend', {
        email
      })
      this.snackbarMessage = resendVerification.data
      this.snackbar = true
    }
  }
}
</script>
Block Unverified Users
To enhance your email verification system's security, it's crucial to prevent unverified users from accessing your application. This involves modifying the authentication controller to check the isVerified status during the login process, especially when using Passport.js's LocalStrategy.
// api/routes/authentication.js

passport.use(
  new LocalStrategy(
    {
      usernameField: 'email',
      passwordField: 'password'
    },
    async function (email, password, done) {
      await GetUser(email)
        .then((user) => {
          return user
        }).then(async (user) => {
          if (!user) {
            return done(null, false, { message: 'Authentication failed' })
          }

          const validation = await comparePasswords(password, user.password)
          if (validation && user.isVerified) {
            return done(null, user)
          } else if (validation) {
            return done(null, false, {
              message: 'You have to verify you email address',
              resendToken: true
            })
          } else {
            return done(null, false, { message: 'Authentication failed' })
          }
        }).catch((err) => {
          return done(err)
        })
    }
  )
)
Resetting and Changing Password
Combining the functions for password resetting and changing into one streamlined process enhances user experience. When a user requests a password change, an email with a token is sent. Clicking the link in this email redirects the user to a form where they can set a new password.
Sending Reset Tokens
First, implement the endpoint for sending reset tokens:
// api/routes/authentication.js

...

router.post('/auth/password/reset', async (req, res) => {
  const email = req.body.email
  const user = await AuthenticationController.GetUser(email)

  if (user) {
    const verificationToken = AuthenticationController.generateVerificationToken()
    const verificationTokenExpire = AuthenticationController.generateVerificationTokenExpire()

    user.verificationToken = verificationToken
    user.verificationTokenExpire = verificationTokenExpire
    user.passwordReset = true
    user.save()

    const signedVerificationToken = AuthenticationController.signVerificationToken(user.email, user.verificationToken)

    await MailerController.SendPasswordChangeToken(user.email, 'Password resetting', signedVerificationToken)
    return res.send({ message: 'Link has been sent. Check you email.' })
  } else {
    return res.send({ message: 'Password can\'t be renew' })
  }
})
Password Change Verification
Next, create the endpoint for verifying the token and accepting a new password:
// api/routes/authentication.js
router.post('/auth/password/change', async (req, res) => {
 const token = req.body.token;
 const password = req.body.password;
 const { email, verificationToken } = AuthenticationController.verifySignedVerificationToken(token);
 const user = await AuthenticationController.GetUser(email);
 if (user && user.verificationToken === verificationToken && user.verificationTokenExpire >= new Date() && user.passwordReset) {
   user.password = await AuthenticationController.generatePasswordHash(password);
   user.passwordReset = false;
   await user.save();
   return res.send({ message: 'Password has been changed.' });
 } else {
   return res.send({ message: 'Token is invalid. Please resend your request.' });
 }
});
Mailer Controller for Reset Tokens
To finalize the password reset functionality, you must adjust your Mailer Controller to send password change tokens correctly. Here’s how you can set up the function responsible for emailing the password reset link
// api.controller/mailer.controller.js

async function SendPasswordChangeToken(to, subject, verificationToken) {
  const html = `<p>Please click into the link below to change your password</p><a href="http://localhost:3000/login/reset/confirmation?token=${verificationToken}">Change your password</a>`
  const text = stripHtmlTags(html)
  await SendEmail(to, subject, text, html)
}

export default {
 ...
  SendPasswordChangeToken
}
Frontend Setup for Password Reset
Requesting a Password Reset
Create a view allowing users to request a password reset. This involves sending a token via email, which they can use to set a new password.
// pages/login/reset/index.vue

<template>
  <div class="mt-12">
    <v-cntainer>
      <v-row justify="center" class="mt-12">
        <v-col cols="12" lg=3 class="mt-12 text-center">
          <email-form button-title="Change/reset password" :form.sync="form"></email-form>
        </v-col>
      </v-row>
    </v-cntainer>
    <snack-bar :snackbar-message="snackbarMessage"></snack-bar>
  </div>
</template>

<script>
import EmailForm from '@/forms/emailForm'
import SnackBar from '@/components/snackBar'

export default {
  name: 'index',
  components: {
    SnackBar,
    EmailForm
  },
  data: () => ({
    form: { finish: false },
    snackbarMessage: ''
  }),
  computed: {
    finish () {
      return this.form.finish
    }
  },
  watch: {
    finish (newVal) {
      if (newVal) {
        this.sendPasswordToken()
        this.form.finish = false
      }
    }
  },
  methods: {
    async sendPasswordToken () {
      try {
        const email = this.form.email
        const response = await this.$axios.post('/api/auth/password/reset', {
          email
        })
        this.snackbarMessage = response.data.message
      } catch (err) {
        this.snackbarMessage = err.response.data.message
      }
    }
  }
}
</script>
Changing the Password
Next, create a form and a corresponding Vue component where users can input their new password after clicking the reset link.
// forms/changePasswordForm.vue
<template>
<v-form
ref="form"
v-model="form.valid"
lazy-validation
>
<v-text-field
v-model="form.password"
:counter="20"
:rules="[(form.password === form.passwordCheck) || 'Passwords must match', ...passwordRules]"
:type="'password'"
label="Password"
required
></v-text-field>
<v-text-field
v-model="form.passwordCheck"
:rules="[(form.password === form.passwordCheck) || 'Passwords must match', ...passwordRules]"
:counter="20"
:type="'password'"
label="Password"
required
></v-text-field>
<v-btn
:disabled="!form.valid"
color="indigo lighten-1"
class="mr-4"
@click="validate"
>
{{ buttonTitle }}
</v-btn>
</v-form>
</template>
<script>
export default {
name: 'changePasswordForm',
data: () => ({
passwordRules: [
v => !!v || 'Password is required',
v => (v && v.length <= 20) || 'Password must be less than 20 characters',
]
}),
props: {
form: {
required: true,
},
buttonTitle: {
required: true
}
},
mounted () {
this.form.valid = false
},
methods: {
validate () {
if (this.$refs.form.validate()) {
this.form.finish = true
this.$emit('update:form', this.form)
}
}
}
}
</script>
Finally, implement the view for users to change their password using the token they received:
// pages/login/reset/confirmation/index.vue

<template>
  <div class="mt-12">
    <v-container>
      <v-row justify="center" class="mt-12">
        <h3>Change your password</h3>
      </v-row>
      <v-row justify="center" class="mt-12">
        <change-password-form button-title="Change password" :form.sync="form"></change-password-form>
      </v-row>
    </v-container>
    <snack-bar :snackbar-message="snackbarMessage"></snack-bar>
  </div>
</template>

<script>
import ChangePasswordForm from '@/forms/changePasswordForm'
import SnackBar from '@/components/snackBar'

export default {
  name: 'index',
  components: {
    SnackBar,
    ChangePasswordForm
  },
  data: () => ({
    form: { finish: false },
    token: '',
    snackbarMessage: ''
  }),
  computed: {
    finish () {
      return this.form.finish
    }
  },
  watch: {
    finish (newVal) {
      if (newVal) {
        this.changePassword()
        this.form.finish = false
      }
    }
  },
  mounted () {
    this.token = this.$route.query.token
  },
  methods: {
    async changePassword () {
      const token = this.token
      try {
        const verification = await this.$axios.post('/api/auth/password/change', {
          token,
          password: this.form.password
        })
        this.snackbarMessage = verification.data.message
      } catch (err) {
        this.snackbarMessage = err.response.data.message
      }
    }
  }
}
</script>
With this setup, you've successfully integrated a system to block unverified users and facilitate password resetting and changing in your Nuxt.js application, enhancing both security and user experience.