
When you start a new monolithic project, you can use a template made by the Nuxt community that handles the integration of Nuxt with Express. But what if you started your project without Express.js and now want to add it? Fortunately, the integration is very straightforward, and you don't need any template at all.
Nuxt is a well-designed framework that offers a lot of flexibility regarding your backend. In this post, I write about integrating Express.js, but you can use this technique to add almost any backend framework
Install Express.js
Begin by installing Express in your project using the command line. This must be done from the root folder of your Nuxt project.
npm install express --save
Next, create a new folder named api in the root of your Nuxt project to contain your backend. While you can choose any name that makes sense to you, remember that you will need to reference this name in subsequent steps.
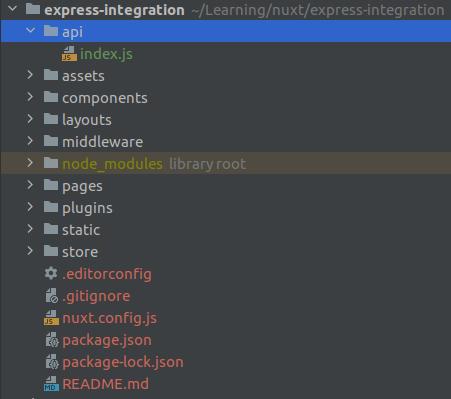
Nuxt Express Integration Basic Structure
Within this api folder, create an index.js file. This file should contain at least a minimal Express.js configuration, as shown below, including a single endpoint for testing purposes.
// api/index.js

const express = require('express')

const app = express()
app.use(express.json())
app.use(express.urlencoded({ extended: false }))

app.get('/test', function (req, res) {
  res.send('Test successful')
})


export default {
  path: '/api',
  handler: app
}
Add Express.js to Nuxt.js
In your nuxt.config.js file, add a new entry to include server middleware for handling backend communication. This is accomplished using the serverMiddleware property.
// nuxt.config.js

...

/*
** Server Middleware
*/
serverMiddleware: {
  '/api': '~/api'
},

...
If your project is set to static generation mode (target: 'static' in nuxt.config.js), ensure you switch to server mode or universal mode (target: 'server') to use server middleware effectively.
Testing the Integration
To test the integration, first, ensure you have Axios installed for making HTTP requests. If you haven't installed Axios yet, you can do so by running the following command in your terminal:
npm install @nuxtjs/axios
Then, add @nuxtjs/axios to the modules section of your nuxt.config.js if it's not already included:
// nuxt.config.js
export default {
 ...
 modules: [
   '@nuxtjs/axios',
 ],
 ...
};
Create a new Nuxt page to test the integration. On this page, add a button that triggers a function to send GET requests to the Express.js test route. Check the developer tools console in your browser to verify the response.
For example, in the pages/index.vue file, you might have:
// pages/index.js

<template>
  <button @click="showMessageFromBackend">Show message from backend</button>
</template>

<script>
export default {
  methods: {
    async showMessageFromBackend () {

      try {
        const response = await this.$axios.get('/api/test')
        console.log(response.data)
      } catch (err) {
        console.log(err)
      }

    }
  }
}
</script>
Note that all requests to your Express backend should be prefixed with /api (or the path you registered in serverMiddleware). This means you would access the backend endpoint /test via /api/test in your Nuxt frontend.
Handle CORS
When developing a Nuxt.js application, you might not face CORS issues due to the built-in development server that serves both your frontend and backend from the same origin. However, when deploying your app with a production build and using a proxy server like Apache or Nginx, CORS policies can lead to errors if your backend is hosted on a different domain or subdomain.
To address CORS issues securely, you can configure Axios in your nuxt.config.js file, specifically setting the baseURL and browserBaseURL properties to match your deployment setup. Here’s how you might adjust your Axios configuration:
// nuxt.config.js

export default {
  ...

  axios: {
    // Base URL for the backend API calls made from the server-side
    baseURL: 'http://api.example.com', // Change this to your API server URL
    // Base URL for the backend API calls made from the client-side
    browserBaseURL: process.env.NODE_ENV === 'production' ? 'http://api.example.com' : 'http://localhost:3000',
  },

  ...
};
This configuration ensures that Axios requests from the server-side (during server-side rendering) and from the client-side (after the page has loaded in the browser) use the appropriate base URLs. Adjust http://api.example.com to your backend's production URL and http://localhost:3000 to your development environment's backend URL as needed.
Additional Consideration for Static Sites
If you’re migrating from a statically generated site (target: 'static') to a server-side rendered or universal application (target: 'server'), remember to adjust your build and start commands accordingly. For development, continue using:
npm run dev
For production builds and starts, use:
npm run build
npm run start
This ensures that your Nuxt application compiles for server-side rendering and starts up correctly, respecting the Axios configuration and handling CORS policies effectively.