
Structuring a Nuxt Application for Docker Deployment
It's not essential to alter the default Nuxt structure, but doing so is highly recommended. As your application expands, having a well-organized Docker structure becomes increasingly beneficial. Moreover, it is a straightforward process that takes only a minute.
Create a dedicated folder for Docker services and move your current application into it. Then, prepare empty folders for Nginx and MySQL. This setup will allow you to modify the default configurations of Nginx, MySQL, or any other service simply by supplying the appropriate configuration files.
Creating Dockerfile
Inside the root directory of your application, create a Dockerfile. This file is essential for building and running your application on a specified port. Given that Nuxt.js is a Node.js application, it's highly practical to base your new image on a Node image. Examine the contents of the Dockerfile.
There may be several aspects that are unclear if you're not familiar with Docker. I'll explain these components now, but if you're already knowledgeable about Docker's workings, feel free to skip ahead to the Docker Compose section.
FROM node:12.16.3-alpine3.9

RUN mkdir -p /var/www/dockerize-nuxt/nuxt-app
WORKDIR /var/www/dockerize-nuxt/nuxt-app

COPY package*.json ./
RUN npm install

COPY . .

RUN npm run build

EXPOSE 3000

ENV NUXT_HOST=0.0.0.0

ENV NUXT_PORT=3000

CMD [ "npm", "start" ]
Add a .dockerignore file to your project with the following minimal content:
.git
.gitignore
node_modules/
The first command in the Dockerfile specifies the base image for building. I recommend against using the 'latest' version, as often suggested in many tutorials, because it can lead to unexpected behavior. Instead, choose a specific Node.js version and test it thoroughly before deploying to production.
Next, the Dockerfile includes commands to create a new folder for your Nuxt application and change the working directory to this new folder. This directory becomes the root of your app within the Docker image, allowing you to execute any command you would typically run outside Docker, assuming all dependencies are installed.
The fourth and fifth commands copy the package.json files, which list your app's dependencies, and then install these dependencies. This step is standard when building a new app for production or from a repository.
Then, the COPY . . command transfers the rest of your app's files from the current host directory to the image's current working directory (/var/www/dockerize-nuxt/nuxt-app). The subsequent RUN npm command should now be self-explanatory.
What may still be unclear is the purpose of the EXPOSE command and the next two commands. EXPOSE informs the Docker service which port to forward your running app to on the host system. Remember, your app runs inside Docker, not directly on the host system, which only runs the Docker service. The ENV NUXT_HOST and PORT commands set environment variables inside Docker to specify the internal address and port where the app runs, with 0.0.0.0 meaning it's accessible on all network interfaces. These settings are crucial when running other services in Docker that communicate with your app on different ports, mimicking how services interact on your host system but in an isolated environment. The only shared resource between Docker and the host is the kernel.
The final command starts your app. At this point, you can include any command to be executed after the build process. Now is the perfect time to build and run your Docker image to ensure your app operates correctly within Docker.
Creating docker-compose
Create a docker-compose.yml file in the container folder (not in the root directory of your app). This will enable you to configure and connect additional services such as MySQL or Nginx. Begin by declaring your app service in the following manner (remember to replace the folder name and service name with your own). The build context should point to the directory containing your Nuxt app.
version: "3.7"

services:
  nuxt-app:
    build: ./nuxt-app
    container_name: nuxt-app
    restart: always
    ports:
      - "3000:3000"
    command: "npm run start"
    networks:
      - nuxt-network
networks:
  nuxt-network:
    driver: bridge
Configuring Nuxt
Before building the image, you need to make a small change in the Nuxt .env file. Locate the HOST declaration and replace 127.0.0.1 (or localhost) with the name of your service as declared in docker-compose.yml.
HOST=nuxt-app
This change will ensure that an internal Docker address is assigned to your Nuxt.js application. You are now ready to build and test your Docker image.
Building and running image
Navigate to the container folder where the docker-compose.yml file is located and enter the following command:
docker-compose up --build -d
The image building process may take some time. After the build completes, thanks to the -d parameter, your image will start running in the background, ensuring it won't block your console. You can verify if the image is running by typing the following command.
docker ps
or go to 127.0.0.1:3000 to check if your app works.
Setup and configuration of Nginx
Let's add Nginx service to docker-compose.yml.
services:
 web-server:
   image: nginx:1.17.10-alpine
   container_name: web-server
   volumes:
     - ./nginx/conf.d/default.conf:/etc/nginx/conf.d/default.conf
     - web-root:/var/www/blowstack
   ports:
     - 80:80
   networks:
     nuxt-network:
   depends_on:
     - nuxt-app
   restart: unless-stopped
volumes:
 web-root
We need to configure the server, and now it's the right time to utilize the previously created empty Nginx folder. Although the Nuxt.js website offers multiple Nginx configuration suggestions, it lacks examples for Docker. To make it compatible with Nuxt, we must include the Docker internal address in the configuration (highlighted in violet).
Below is the essential minimal configuration. Create a folder named conf.d inside the empty Nginx folder, and then create a file named default.conf. Incorporate the following configuration into the conf.d file, adjusting service names as necessary. It's also crucial to change server_name to your domain.
If you're using a local environment, don't forget to add an appropriate line to your hosts file, such as:
127.0.0.1 local.blowstack.com
default.conf
upstream docker {
   server nuxt-app:3000;
 }

map $sent_http_content_type $expires {
   "text/html"                 epoch;
   "text/html; charset=utf-8"  epoch;
   default                     off;
}

server {
   listen          80;             # the port nginx is listening on
   server_name     local.blowstack.com www.local.blowstack.com;    # setup your domain here

   gzip            on;
   gzip_types      text/plain application/xml text/css application/javascript;
   gzip_min_length 1000;

   location / {
       expires $expires;

       proxy_redirect                      off;
       proxy_set_header Host               $host;
       proxy_set_header X-Real-IP          $remote_addr;
       proxy_set_header X-Forwarded-For    $proxy_add_x_forwarded_for;
       proxy_set_header X-Forwarded-Proto  $scheme;
       proxy_read_timeout          1m;
       proxy_connect_timeout       1m;
       proxy_pass                          http://docker;
   }
}
Once again, navigate to the container folder where the docker-compose.yml file is located and enter the following command:
docker-compose up --build -d
After executing this command, verify that the app is working on your local domain, and then proceed to the MySQL section.
Setup and configuration of MySQL
The final service we will set up, as introduced in the first part of this guide, is MySQL. This process is quite similar to the Nginx setup, but it additionally requires updating the DB_HOST parameter in the .env file for Nuxt.
If you wish to overwrite the default MySQL configuration, you can do so by placing your custom config file in the MySQL folder, following the same approach used for Nginx. I've purposely suggested using port 3307 because you likely have a local MySQL instance running on port 3306, and using the same port would result in conflicts.
DB_HOST=db-mysql
You may replace db-mysql with any other descriptive name of your choice. This name should be used in the docker-compose.yml file to define the MySQL service, and it must match in both the .env file for Nuxt and the docker-compose.yml file.
services:
  db-mysql:
    image: mysql:8.0
    container_name: db-mysql
    command: '--wait_timeout=28800 --default-authentication-plugin=mysql_native_password'
    volumes:
      - "mysql-data:/var/lib/docker/volumes/blowstack/mysql"
    environment:
      MYSQL_ROOT_PASSWORD: password
      MYSQL_DATABASE: database_name
    ports:
      - "3307:3307"
    restart: always
    networks:
      - nuxt-network
volumes:
  web-root:
  mysql-data:
Navigate to the container folder where the docker-compose.yml file is located, and enter the following command:
docker-compose up --build -d
After executing this command, verify that your app is successfully communicating with MySQL.
Building image for production
You already have a functioning solution for your app within the Docker service. However, you have not yet created an image that can be easily distributed. So far, we've built the nuxt-app service from local files, and it remains undeployed to Docker Hub, thus still entirely local. To update and rebuild your image, you still require the local files.
Now is the time to create and push an image of your app to the Docker registry. It's important to note that we didn't use a Dockerfile for the Nginx or MySQL services; instead, we used pre-built images from the Docker Hub repository. We will do the same for your app, but in addition, you will host it on a private repository accessible only to your team.
First, stop all running containers:
docker stop $(docker ps -aq)
Then, change the directory to the root of your app where the Dockerfile is located and execute the following command (replace 'nuxt-app' with your app's name):
docker build -t nuxt-app .
Meanwhile, proceed to Docker Hub and create a new private repository.
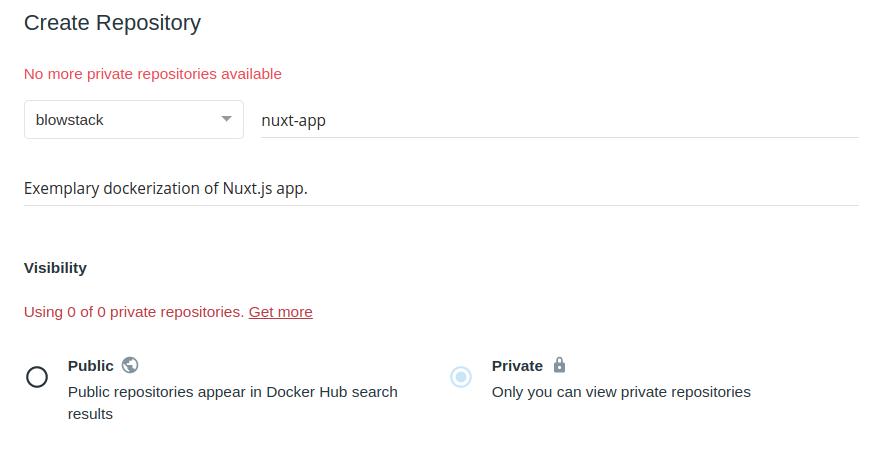
You will receive instructions on how to push your new image to this repository using the command-line interface (CLI).

For my example, it will be executed as follows:
Tag the image with the new repository name:
docker tag nuxt-app:latest blowstack/nuxt-app
Push the image to the repository:
docker push blowstack/nuxt-app:latest ```"
Testing the Production Configuration
Update the Nuxt service section in your docker-compose.yml file by replacing the build directive with your newly created image:
nuxt:
  # build: ./nuxt-app
    image: blowstack/nuxt-app:latest
Rebuild all images based on the updated docker-compose.yml file:
docker-compose up --build -d
Check if it's working in the browser.
Congratulations! You can now easily commit changes to your Nuxt app image, push it to the registry, and run it anywhere in minutes without the need for complicated configuration.
Next steps
You're free to add any service to work alongside your Nuxt image. In subsequent parts, we will delve into more sophisticated service implementations and address some common challenges encountered when dockerizing Nuxt.js apps.